Frittelle di Zucchine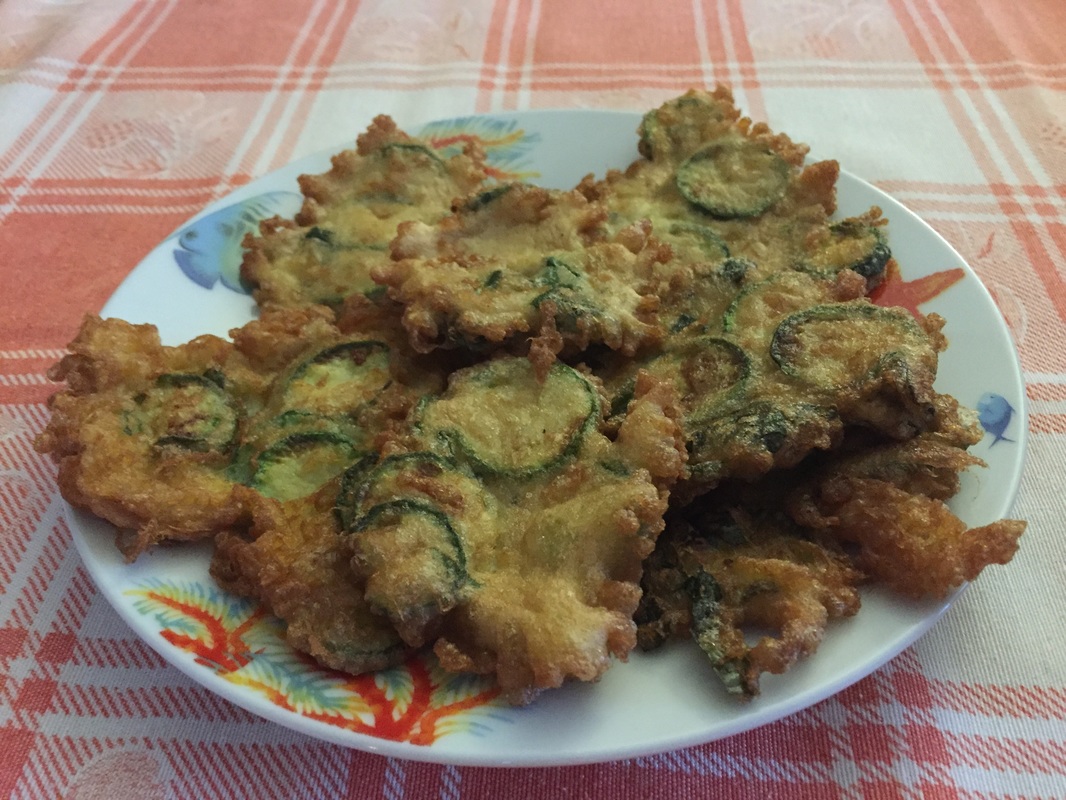
Requirements:
-Large pan -Raw Zucchini (amount of your choice) -Eggs -Basil -Parsley -Salt (and pepper if desired) -Parmesan cheese (grated) -Baking soda/baking powder -Sunflower seed oil/ Vegetable oil My First Attempt This is a short video from my recent first attempt at making Frittelle on my own! It was actually really easy! The frying is the messiest part.
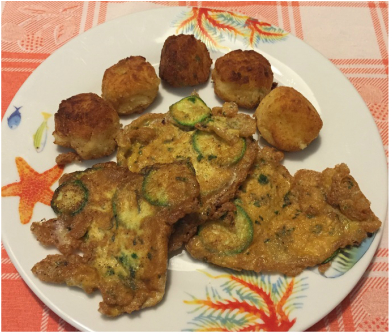
I was starving so I used some left over mash potatoes and turned them into fried mash potato balls as well hahaha.
|
Fried Zucchini. Simple. Wonderful. Great alone, or with mayo, or in a sandwich. Here's how it's done:
Step 1: wash zucchini, then chop into thin slices, they should look like quarters.
Step 2: place slices in a bowl, sprinkle in salt (and pepper if you'd like) then let sit for an hour. Stir occasionally. Step 3: after letting the zucchini sit (to absorb the salt), rinse and dry well Step 4: time to take out the eggs, break in to a bowl, and beat until yellow. (The amount of eggs used depends on the amount of Zucchini. For example: 4 zucchini to 3 eggs, etc.) Step 5: chop up a bit of basil and a bit of Parsley, then add to the beat eggs. Step 6: add zucchini slices to bowl with eggs, parsley, and basil, then mix well. Step 7: add a pinch of baking soda or baking powder (to help the frittelle rise) Let sit for 5 minutes. Step 8: place large pan on stove top, add oil (a lot, think of making french fries), set to high heat, wait for oil to heat up Step 9: use a spoon to pour in a little bit of the zucchini mix at a time Step 10: fry, turn frittelle over 2 or 3 times until golden, no need to cook too long. Step 11: when done, place on paper towel to dry, this will absorb some of the access oil. Step 12: repeat until mix is done, don't forget to dry the oil Step 13: EAT If you have any questions, or if you ever try out this recipe, let me know how it turns out! Email me!
|
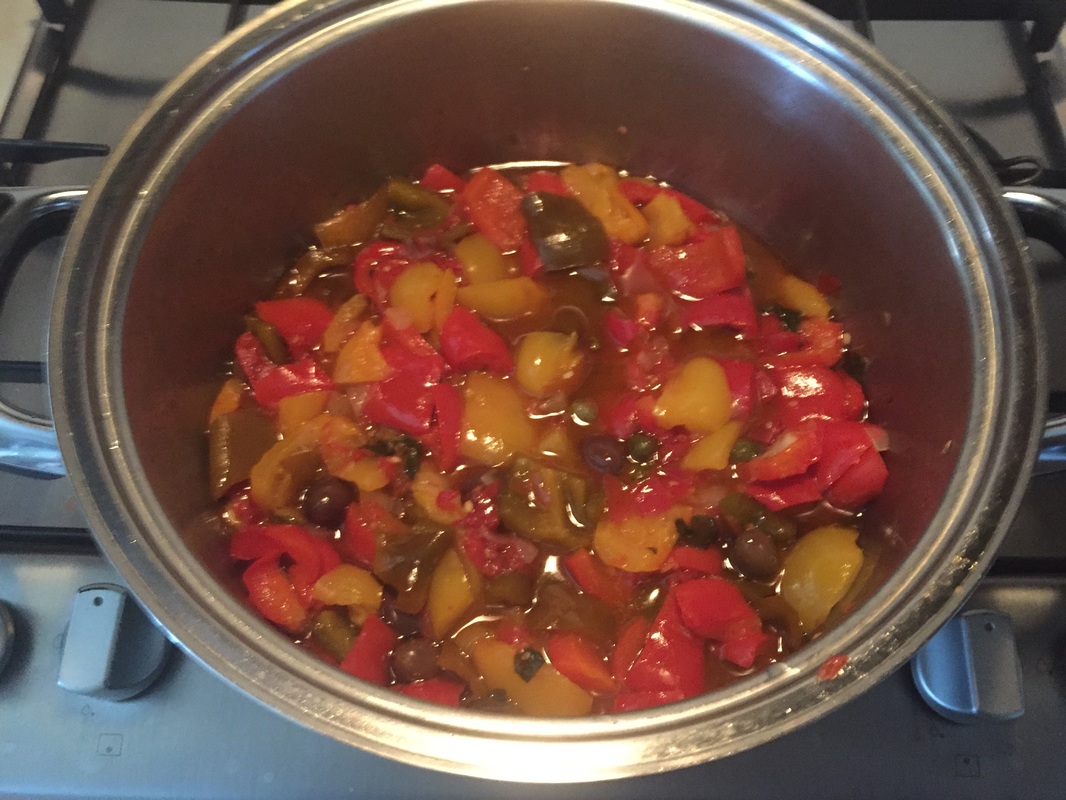
Peperonata
Requirements:
-Large Pot -Bell Peppers, gutted and chopped into squares (Yellow & Red, even a red and green mix if desired) -Tomatoes (3-4, chopped) -Onion (1 whole, chopped) -Basil -Salt & Pepper -Olive Oil (EVOO) -Garlic (sauteed for a little while and then can be removed before onions are added) Optional: -Olives -capers |
Sauteed Peppers. Simple. Vegetarian. Great for a light lunch with a few appetizers on the side.
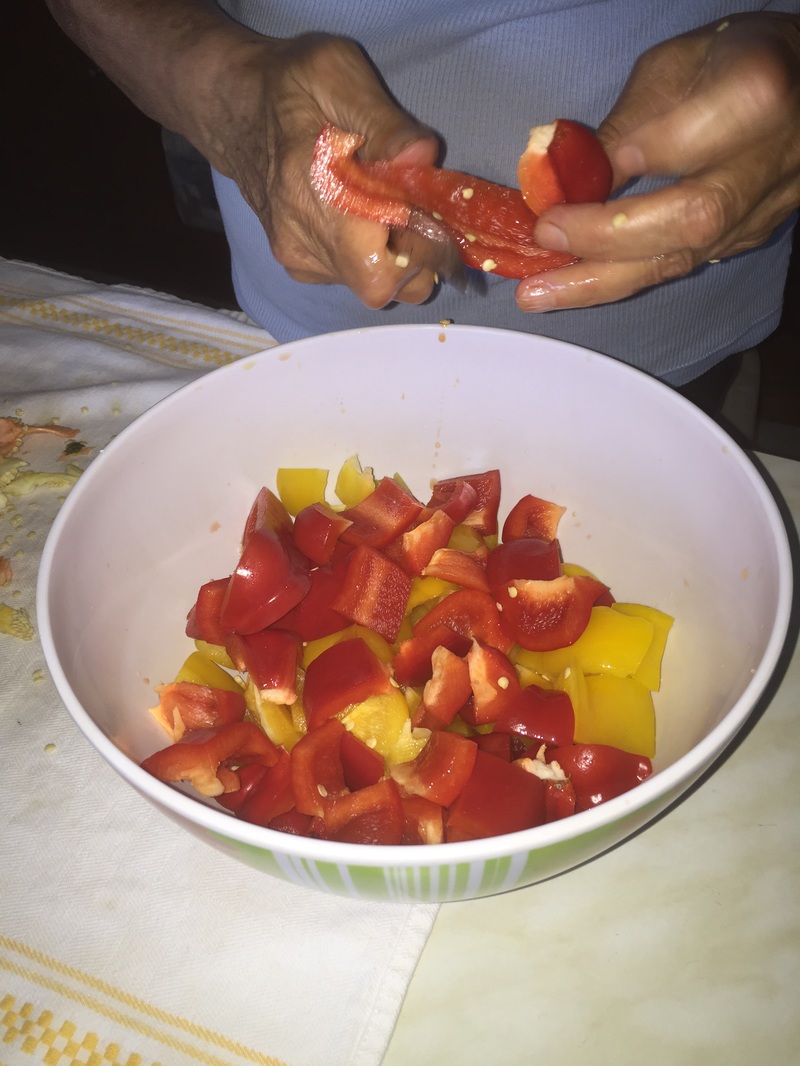
Step 1: First, wash and gut peppers. Remove the seeds and then chop each pepper into medium sized squares (or into long thin slices, depending on preference.)
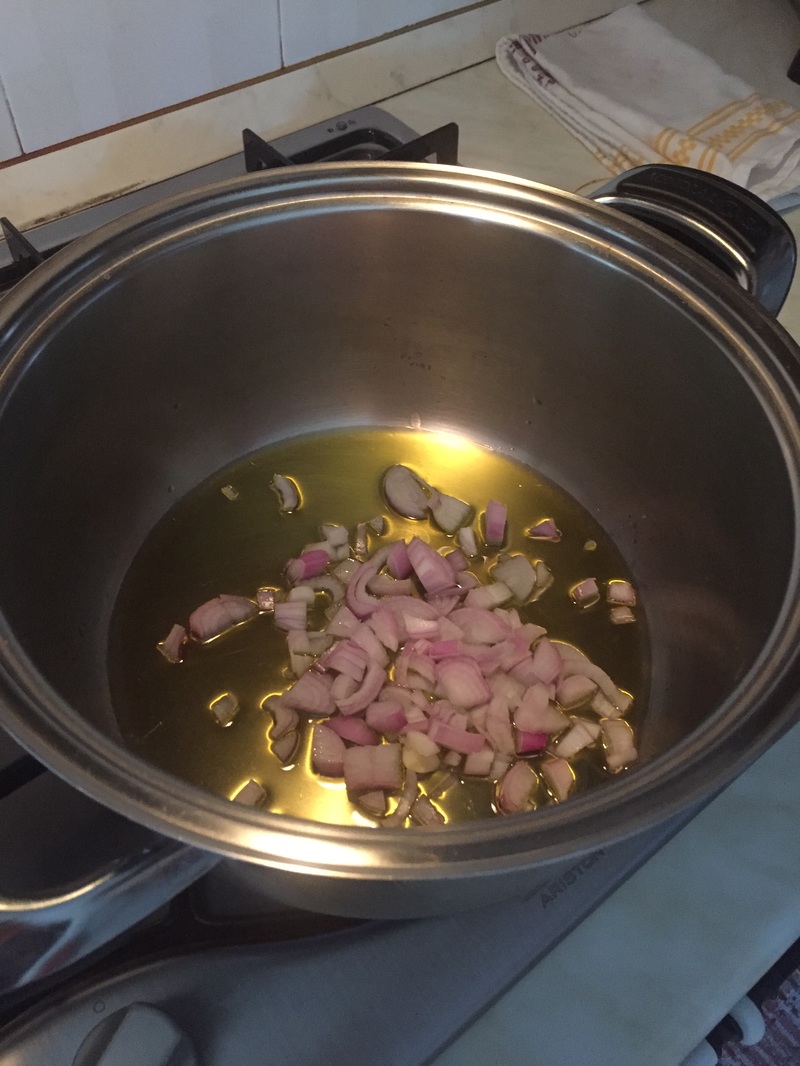
Step 2: Next, place a large pot on the stove and pour in the olive oil, not too much, just coat the bottom of the pot a bit. Take one garlic clove and chop into bigger sized chunks, add to oil, then let it saute until brown. Step 3: Remove garlic chunks, and toss them (so the garlic does not overwhelm the dish). Chop one whole onion, then add to the oil. Let saute. Step 4: Next, add the chopped peppers into the pot with the sauteed onions to cook. Step 5: Then, chop up 3-4 tomatoes, add to pot with the peppers. Step 6: Add a few basil leaves, whole. If leaves are larger, cut into two or three pieces. Step 7: Add Salt and Pepper to taste. Step 8: Let cook for 30-40 minutes, stirring ever so often, on high heat until mostly cooked, then turn down the heat and let the peppers finish cooking. Step 9: Last step, If desired, add olives and capers. Step 10: EAT (Trick: if it's dry, you've f'd up; if it's moist, perfection.) |
Tomato Sauce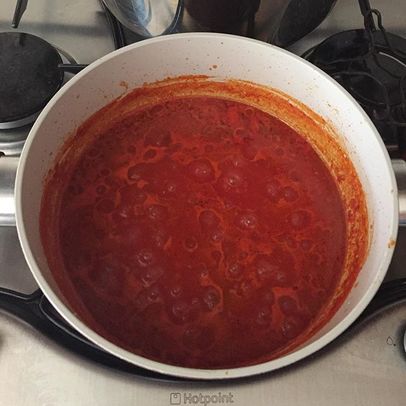
Requirements:
-Large pot -Tomatoes -Onions -Garlic -Celery -Carrots -Basil -EVOO
|
A wonderful base for many dishes!
Step 1: Chop onions, carrots, and celery finely. Take one garlic clove, and cut into large chunks.
Step 2: Step 3: Place large pot on the stove, add olive oil. High heat. Add garlic chunks, let them brown, then remove. Add chopped onions, carrots, and celery into the pot. Step 4: Step 5: Step 6: Step 7: Step 8: Step 9: Step 10: Step 11: Step 12: Step 13: |
@CristinaRomagnolo.com 2016. All Rights Reserved.